How files get deleted
Files in the Documents Plugin can be deleted in two ways:Explicit deletion
Using the Kafka delete action described below to manually delete a specific file by its
fileId and customId.Implicit deletion (replacement)
When uploading a new file with the same
customId AND documentType combination as an existing file, the previous file is automatically marked as deleted.Understanding implicit deletionThe implicit deletion behavior ensures that each
customId + documentType combination points to only one active file. When you upload a new file with an existing combination:- The previous file is marked as deleted in the database
- The previous file’s download URLs stop working
- The new file becomes the active document for that combination
customId.Prerequisites
Before deleting files, ensure:- Access Permissions: Ensure that the user account used has the necessary access rights for updates or deletions.
- Kafka Configuration:
- Verify Kafka Setup: Ensure proper configuration and accessibility of the Kafka messaging system.
- Kafka Topics: Understand the Kafka topics used for these operations.
- File IDs and Document Types: Prepare information for updating or deleting files:
fileId: ID of the file to delete.customId: Custom ID associated with the file.
In the example below, we use a
fileId generated for a document using Uploading a New Document scenario.Configuring the deletion process
 To delete files, follow these steps:
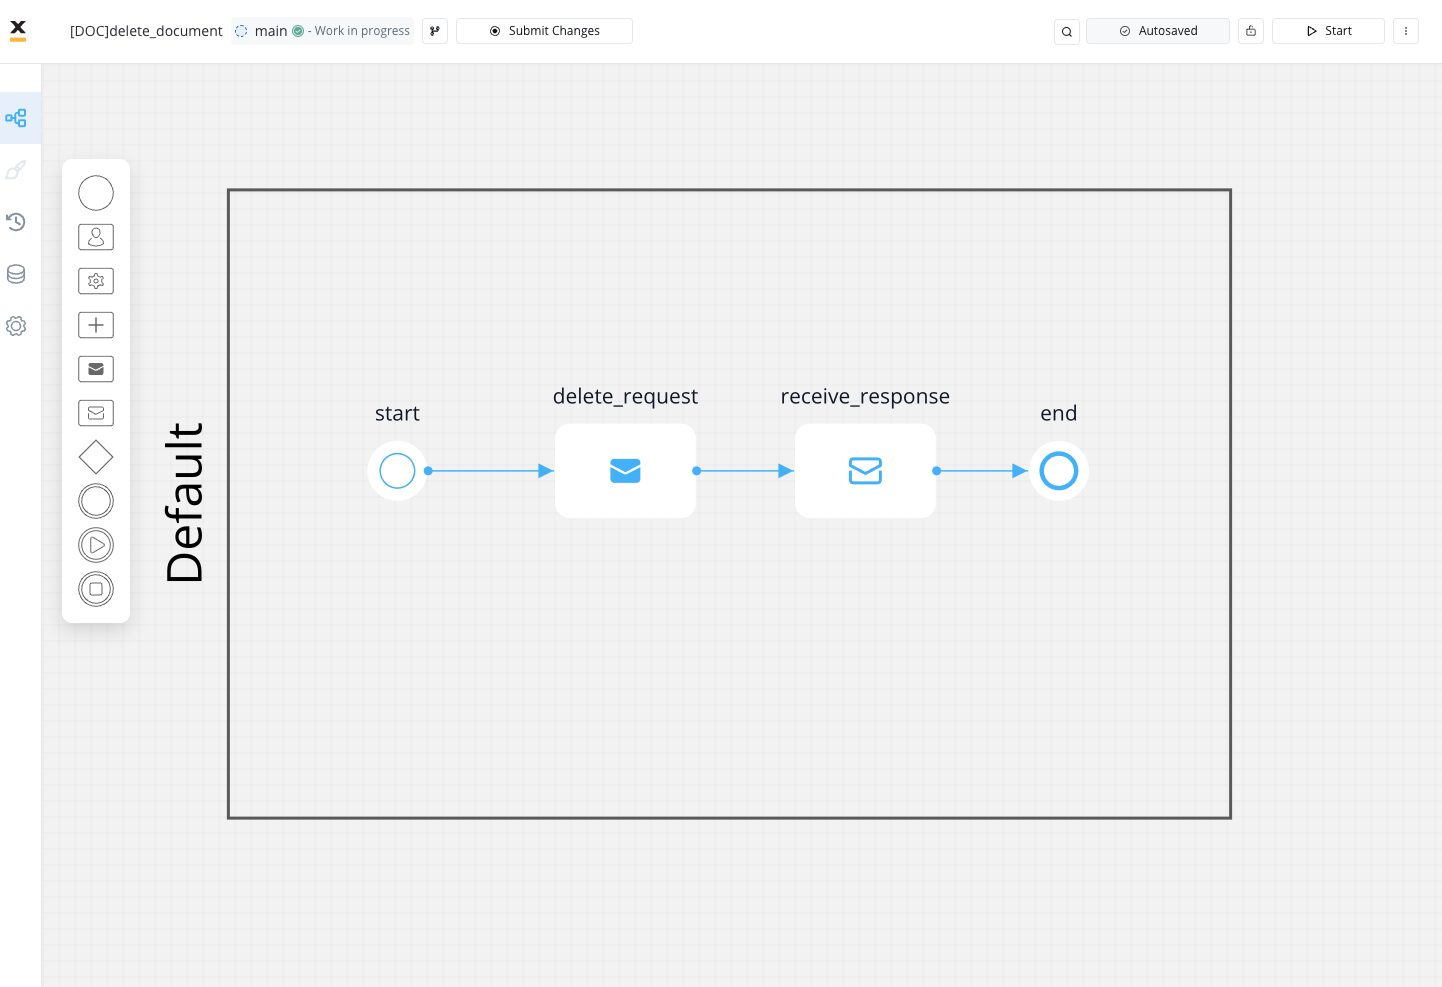
- Create a process that includes a Send Message Task (Kafka) node and Message Event Receive (Kafka) node:
- Use the Send Message Task node to send the delete request.
- Use the Receive Message Task node to receive the delete reply.
- Configure the first node (Send Message Task) by adding a Kafka Send Action.
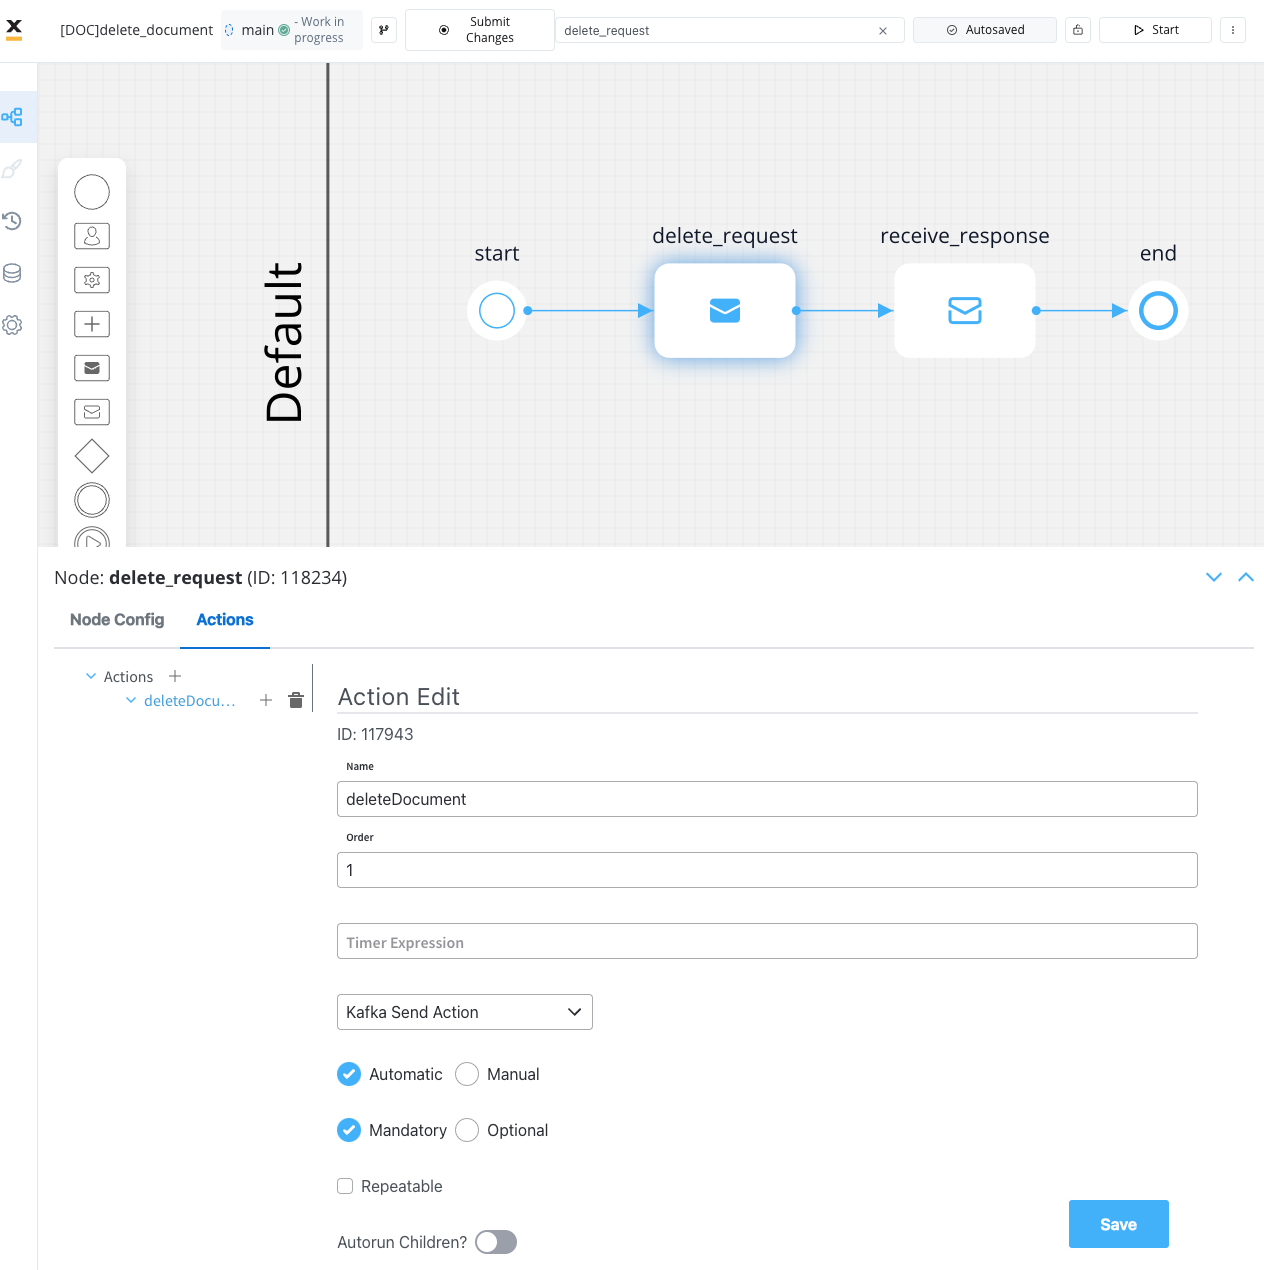
- Specify the Kafka topic for sending the delete request.
To identify defined topics in your environment: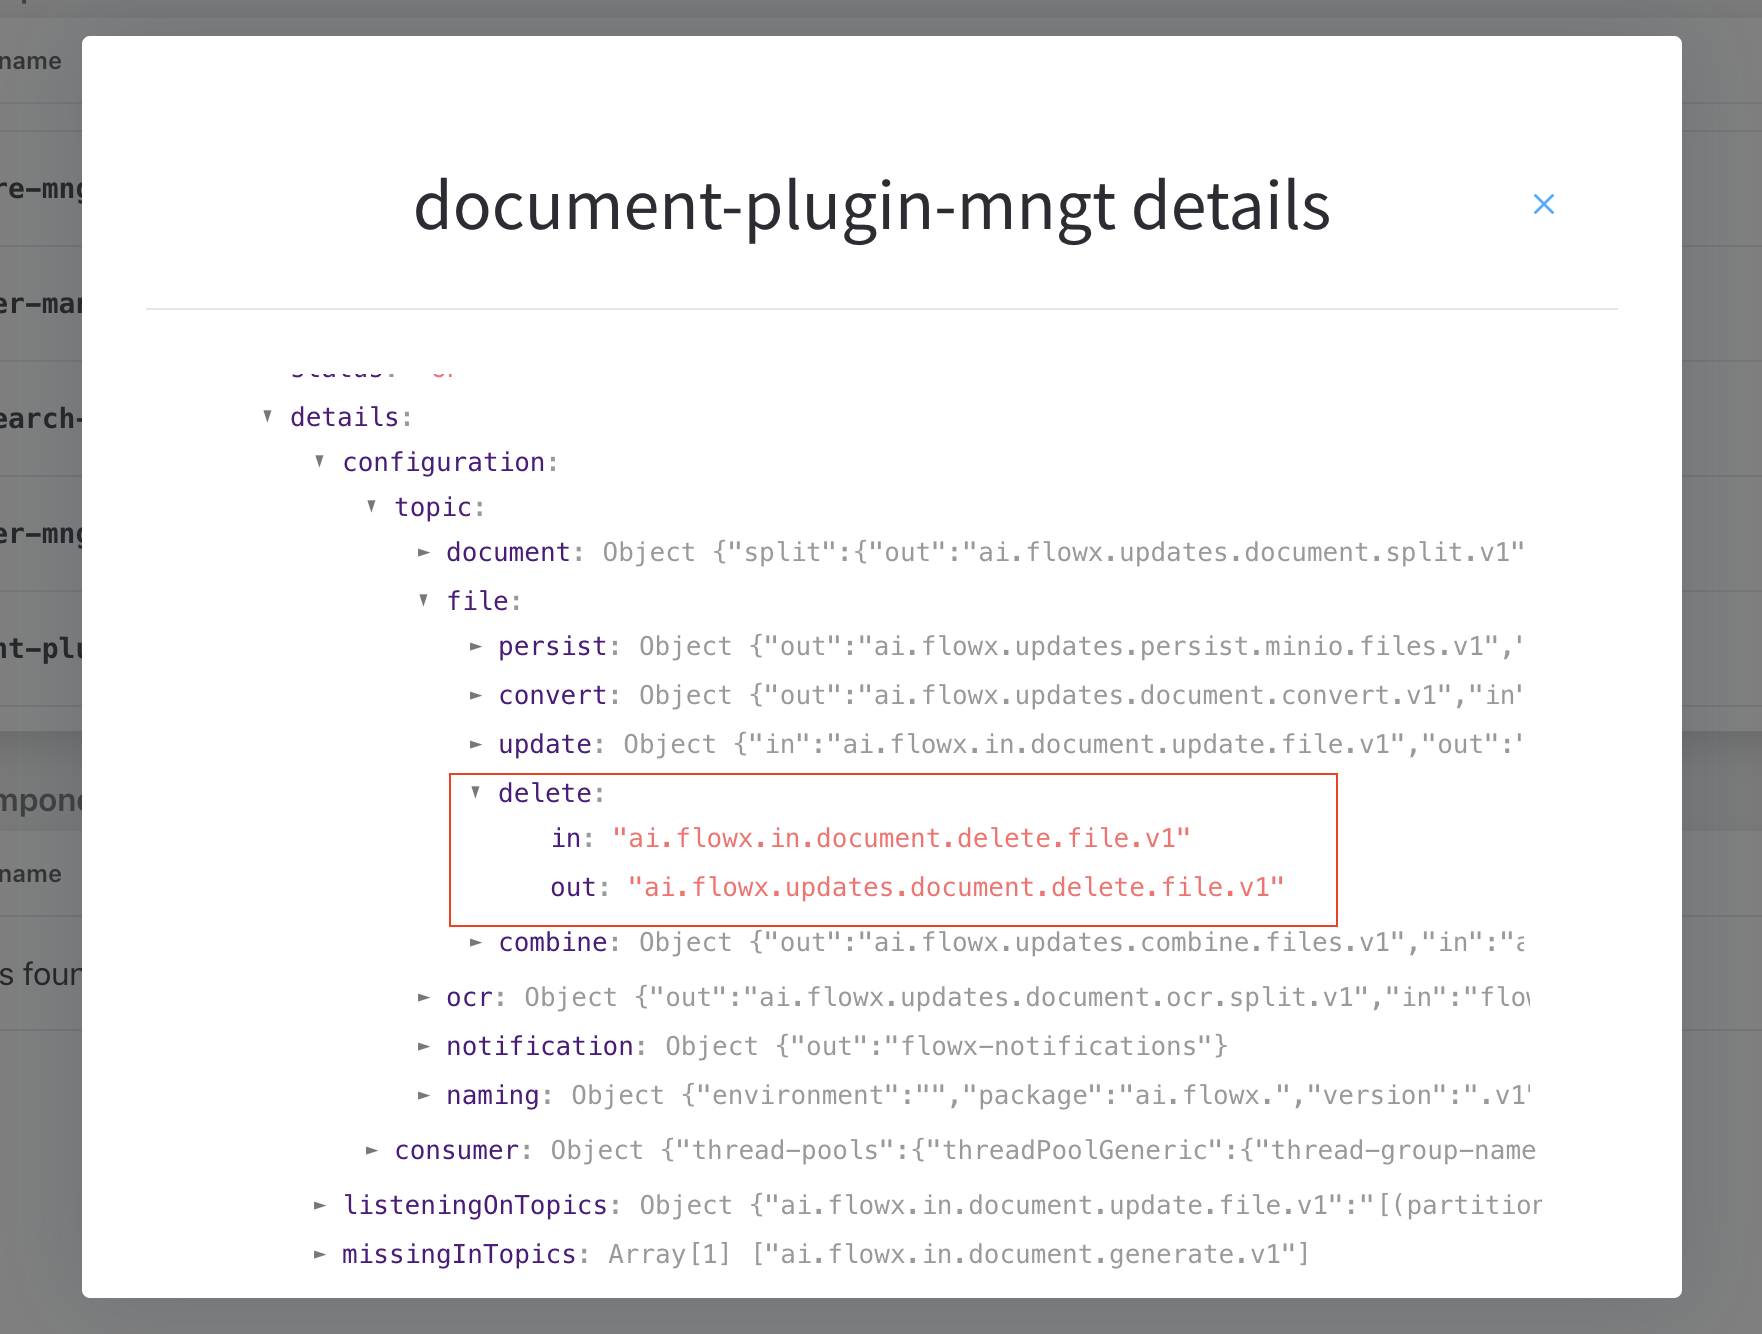
- Navigate to Platform Status > FLOWX Components > document-plugin-mngt and click the eye icon on the right side.
- In the details screen, expand the
KafkaTopicsHealthCheckIndicatorline and then details → configuration → topic → file → delete. Here will find the in and out topics for deleting files.
- Fill in the request message body.

Message request example
Example of a message following the custom integration data model:- fileId: The ID of the file.
- customId: The custom ID.
- Configure the second node (Receive Message Task) by adding a Data stream topic:
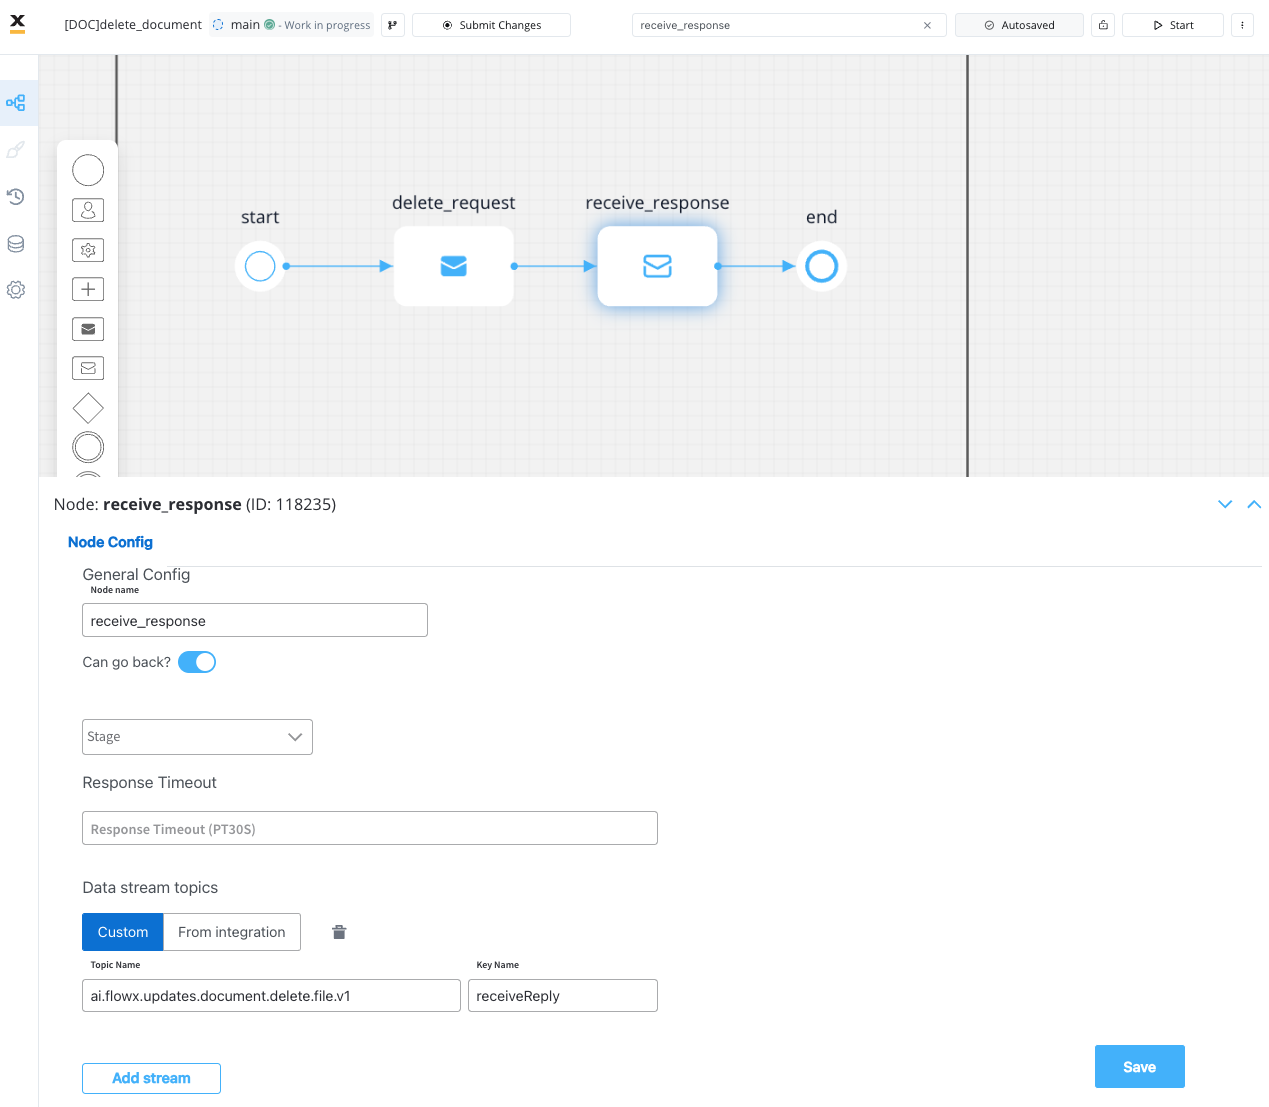
The response will be sent to
..out Kafka topic.Receiving the reply
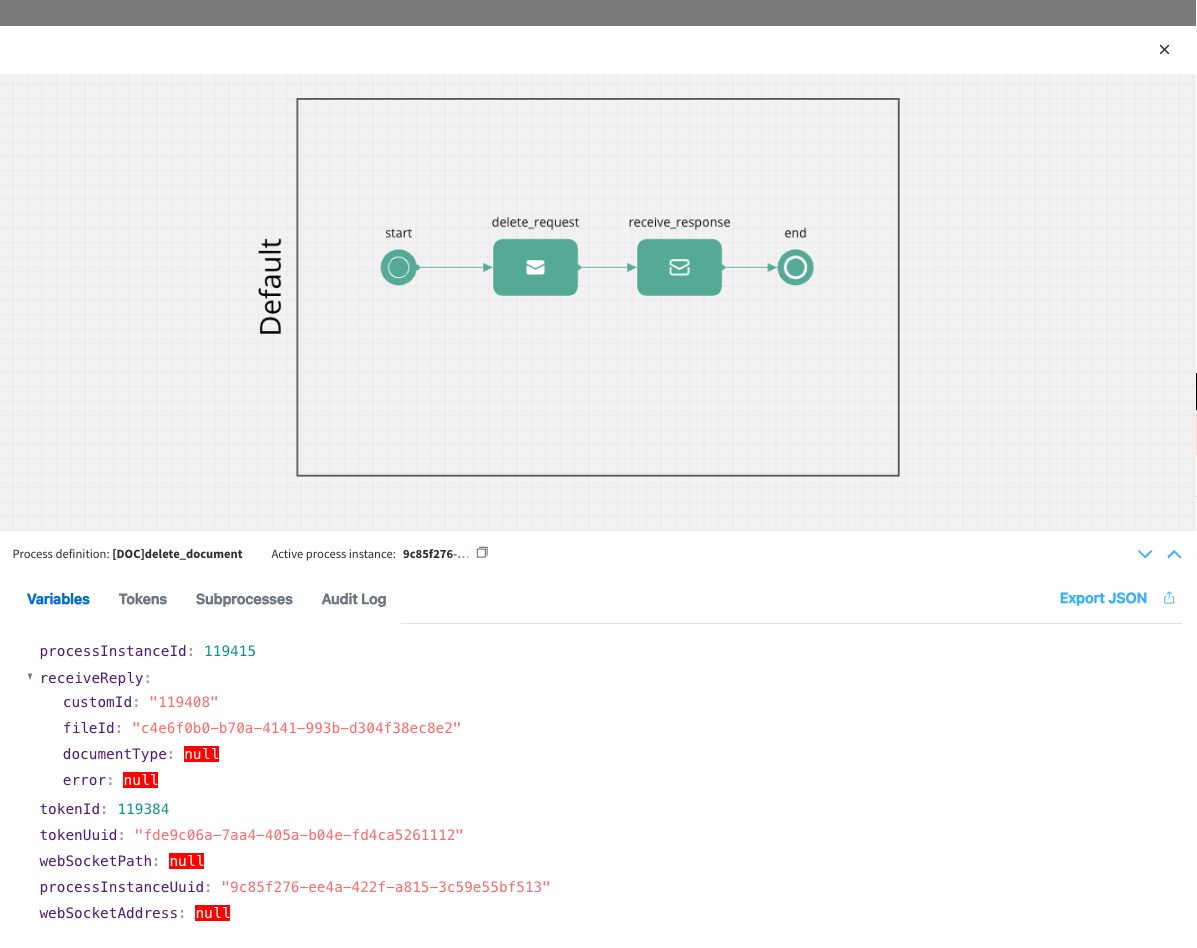 The reply body should contain the following values:
- customId: The unique identifier for your document (it could be for example the ID of a client)
- fileId: The ID of the file
- documentType: The document type
- error: Any error message in case of an error during the deleting process