Available starting with FlowX.AI 5.3.0: UI Flows enable you to build reusable, multi-platform user interfaces that work across web, iOS, and Android applications.
Overview
UI Flows are a project resource for use cases where full BPMN mapping is unnecessary. Full BPMN mapping for simple UI experiences introduces overhead and complexity. UI Flows also eliminate subprocesses that add layers to the main process for UI purposes only.
Multi-Platform Support
Create UI once and deploy to web, iOS, and Android with platform-specific configurations
Process Integration
Launch FlowX processes from UI Flows when needed using Start Process UI Action
Navigation Management
Manage Navigation Areas, pages, and scrolling within UI Flows Designer
Task Manager Integration
Embed Task Manager as a UI component to display task lists
AI Chat Integration
Add Chat components for conversational AI experiences powered by AI agents
Key characteristics
| Characteristic | Description |
|---|---|
| Project Resource | Managed as independent project resources, separate from process definitions |
| UI Designer | Configure using UI Designer (navigation areas appear as UI assets instead of BPMN nodes) |
| Navigation Areas | Add navigation areas as UI assets to define the user journey |
| Components | Supports components, substitution tags, media items, and enumerations |
| Theme Support | Themes apply to UI Flows |
| Data Model | UI Flows have their own data model for localization and formatting |
| FLX UI Flow Component | The flx-ui-flow component renders UI Flows and can be embedded in any container app |
| Custom Components | Custom components can be added to UI Flows |
When to use UI Flows
Use UI Flows for
Use UI Flows when you need a user interface without BPMN process orchestration:Information Display
Dashboards, reports, and static content that doesn’t require process orchestration
Task Management
Task lists and task management interfaces with embedded Task Manager component
Navigation Shells
App navigation structures, home pages, and menu systems
Form Collections
Data entry forms that start processes but don’t need their own process context
Use processes for
Use processes when you need:Business Logic
Complex workflows with business rules, approvals, and integrations
State Management
Applications requiring process state tracking and persistence
Orchestration
Multi-step operations with decision points and parallel execution
Combine both approaches
Example:- UI Flow provides the home screen, navigation, and dashboard
- User clicks “Apply for Loan” → Start Process UI Action launches the loan process
- After process completion, user returns to the UI Flow dashboard
Key features
What’s included in UI Flows v1:
- Create and render UI Flows for Web, iOS, and Android platforms
- Navigate between Navigation Areas with Navigate To action
- Embed Task Manager component for task management
- Configure UI Flow data model for localization
- Start FlowX processes from UI Flows via Start Process action
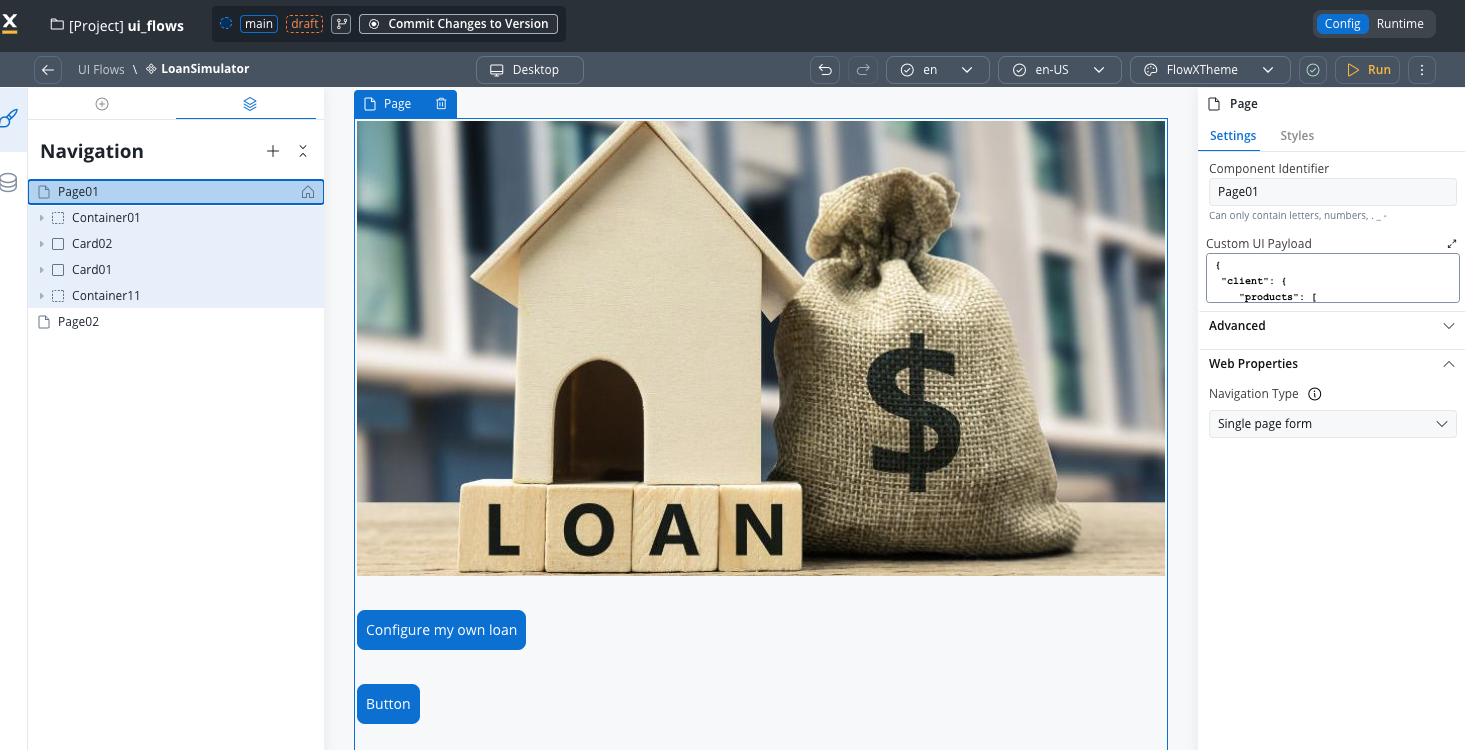
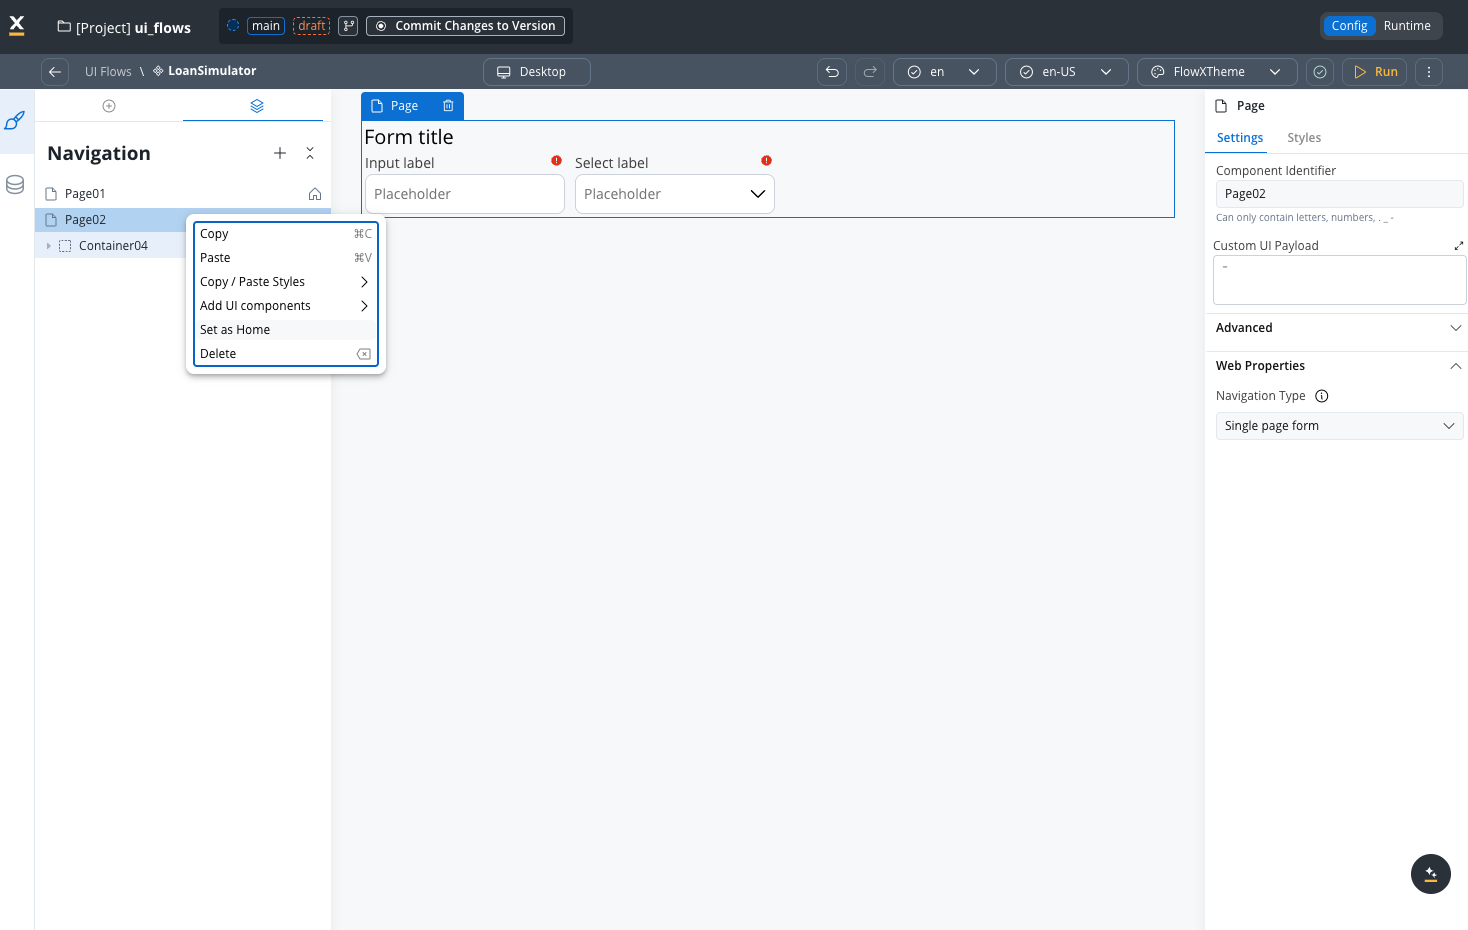
Navigation Areas management
In UI Flows Designer:- Create pages and navigation flows
- Configure navigation areas (Page, Tabbar, Zone, Modal)
- Set up header and footer zones (web only)
- Define home pages with navigation icons
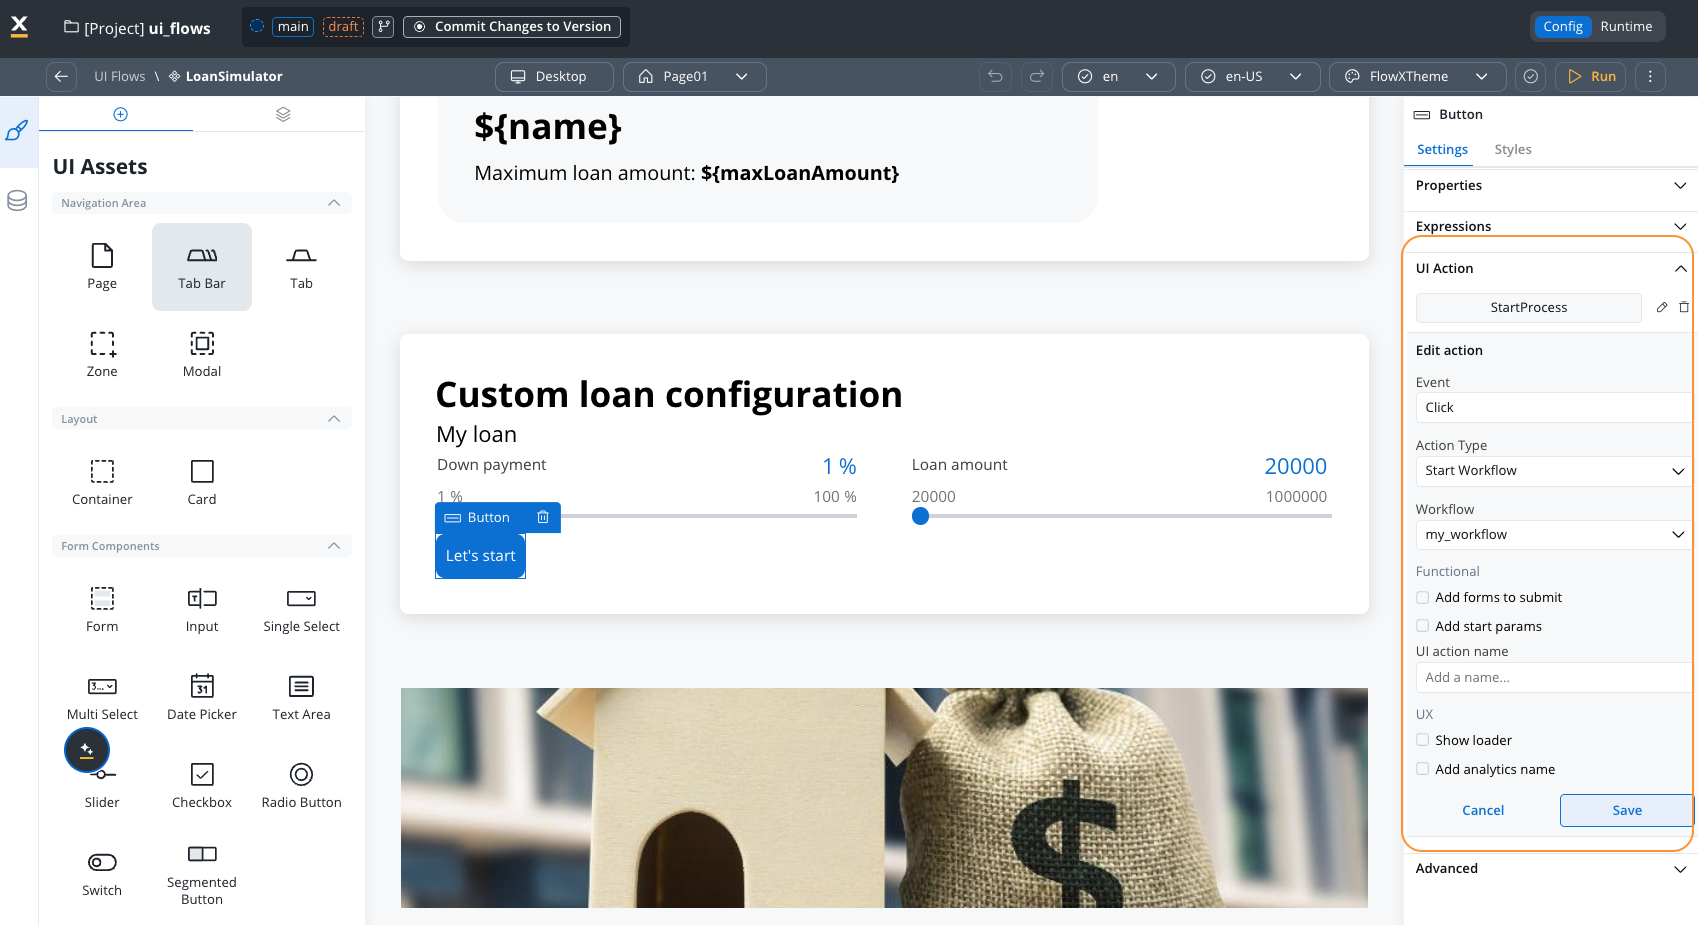
Start Process UI action
Launch FlowX processes from UI Flows:- Start processes on button clicks or events
- Pass data from UI Flow to process
- Return to UI Flow after process completion
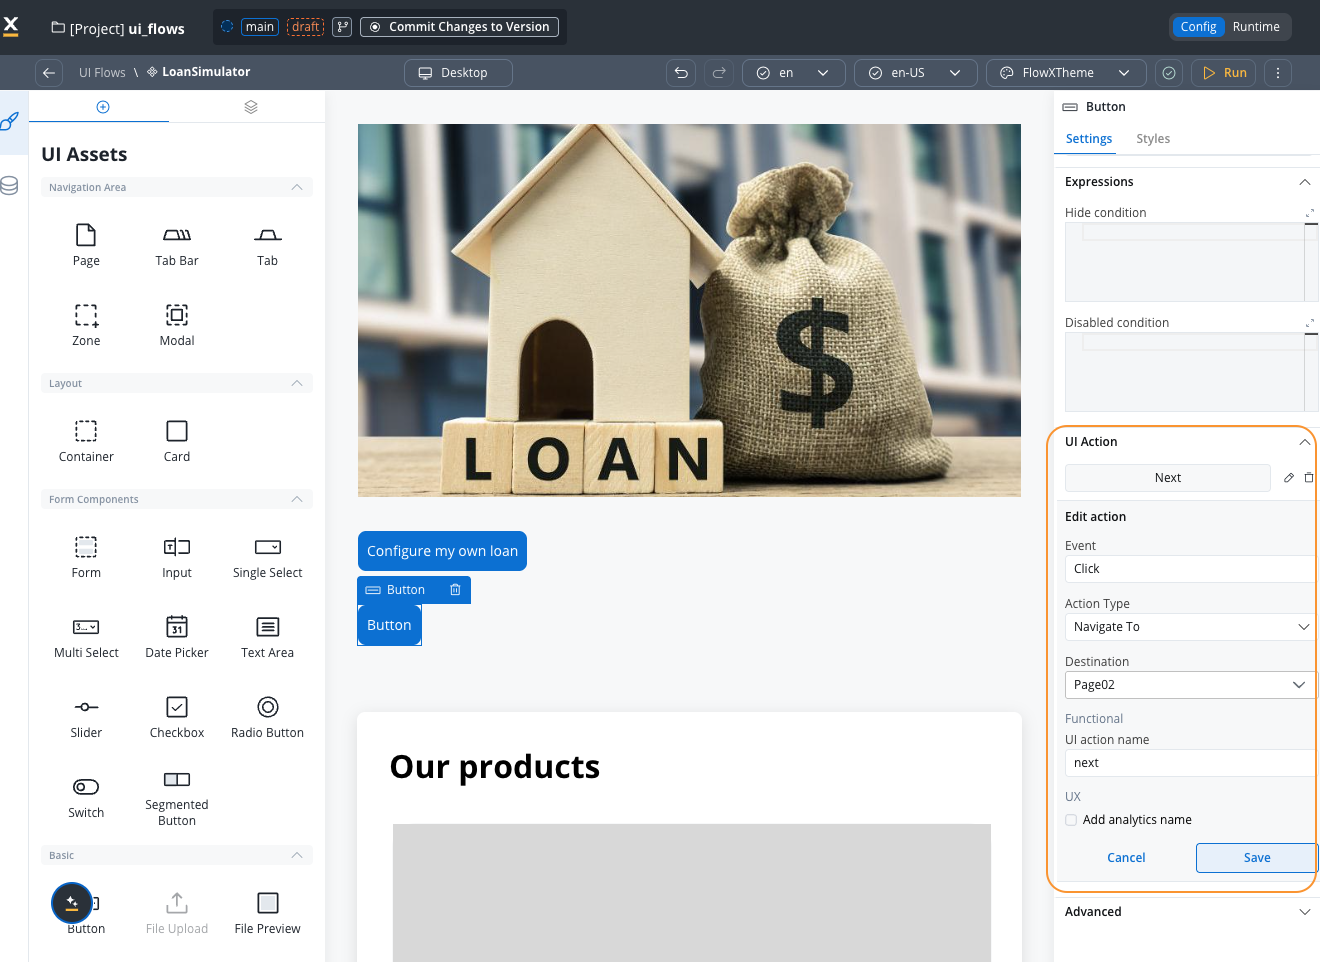
Navigate To UI action
Configure navigation within UI Flows:- Navigate to specific Navigation Areas
- Scroll to Container elements
- Create multi-step wizards
Task Manager component
Embed Task Manager in UI Flows:- Display task lists
- Filter and search tasks
- Launch tasks in context
Home page support
- Designate any page as the home page
- Automatic home icon in navigation
- Return to home from any screen
Export and import
You can export and import UI Flows to transfer them between projects or environments.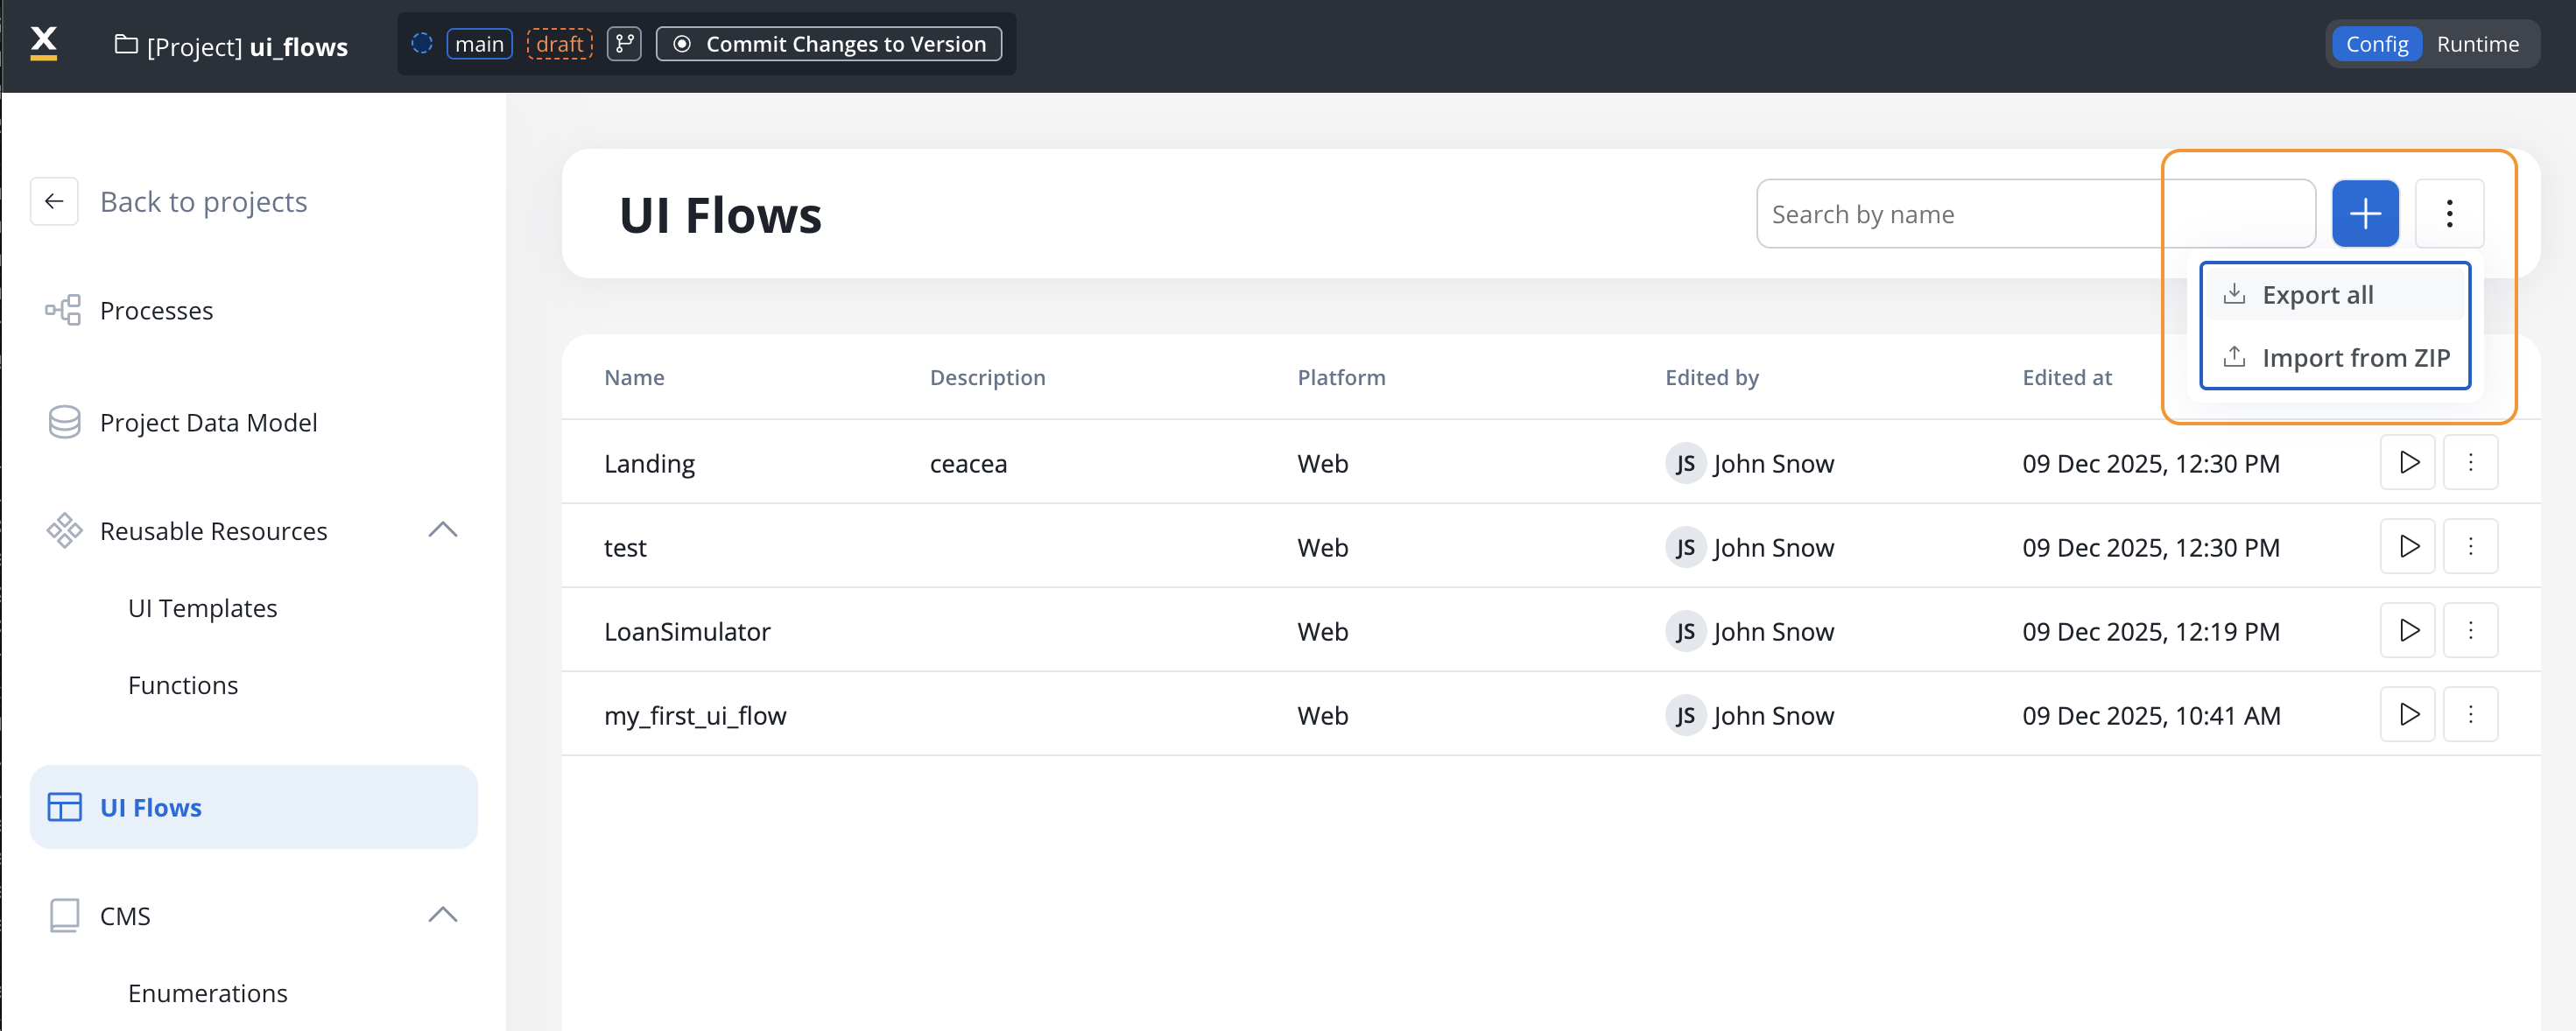
Exporting
- Open the context menu on the UI Flows list page
- Select Export for the UI Flow you want to export
- The UI Flow is downloaded as a ZIP file
Importing
- Open the context menu on the UI Flows list page and select Import
- Select the ZIP file exported from another project or environment
- If UI Flows with the same identifiers already exist, a Review Resource Identifiers Conflicts modal appears
- Choose a strategy for each conflicting UI Flow (or use Apply to all):
- Keep both - imports the UI Flow as a new copy alongside the existing one
- Replace - overwrites the existing UI Flow with the imported version
- Skip this one - keeps the existing UI Flow unchanged
- Click Continue to complete the import
Importing is only available for work-in-progress (WIP) project versions. You cannot import into a committed version.
Creating a UI Flow
Create UI Flow resource
In FlowX Designer, navigate to your project and create a new UI Flow as a project resource.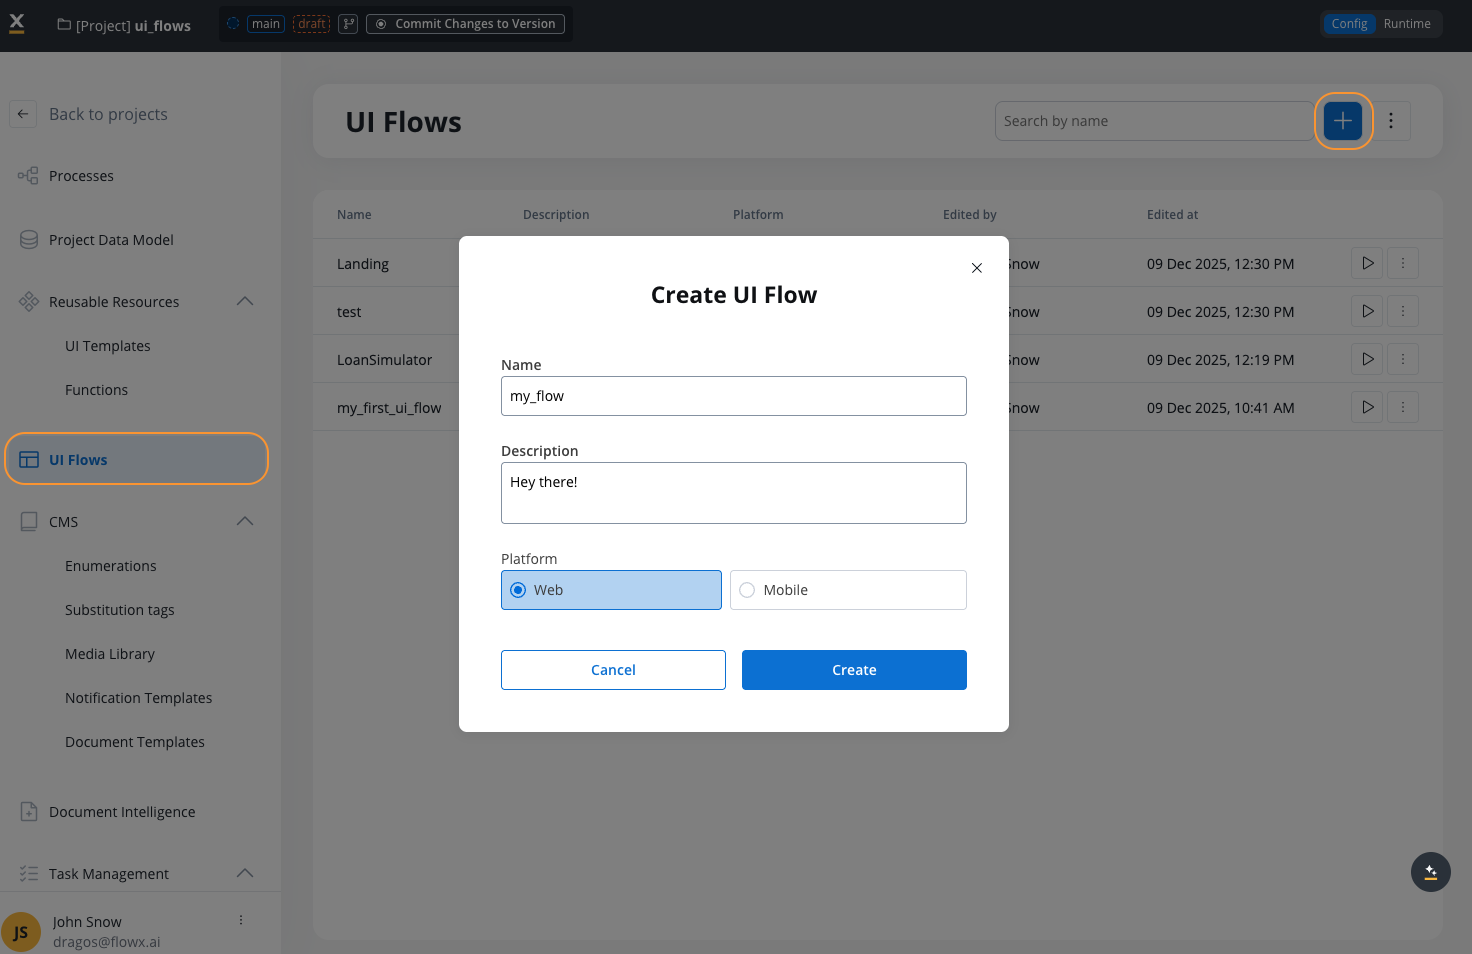
- Navigate to UI Flows tab
- Click + Add button
- Enter a name and description
- Select platform (Web or Mobile)
Design navigation structure
Open UI Flows Designer and manage Navigation Areas:
- Add Navigation Areas (pages)
- Configure navigation type (Single Page or Wizard)
- Setup zones (header, content, footer) for web
- Define navigation flow between areas
Add UI components
Build your interface using the component library:
- Drag and drop UI components
- Configure component properties
- Add Task Manager component if needed
- Setup data bindings
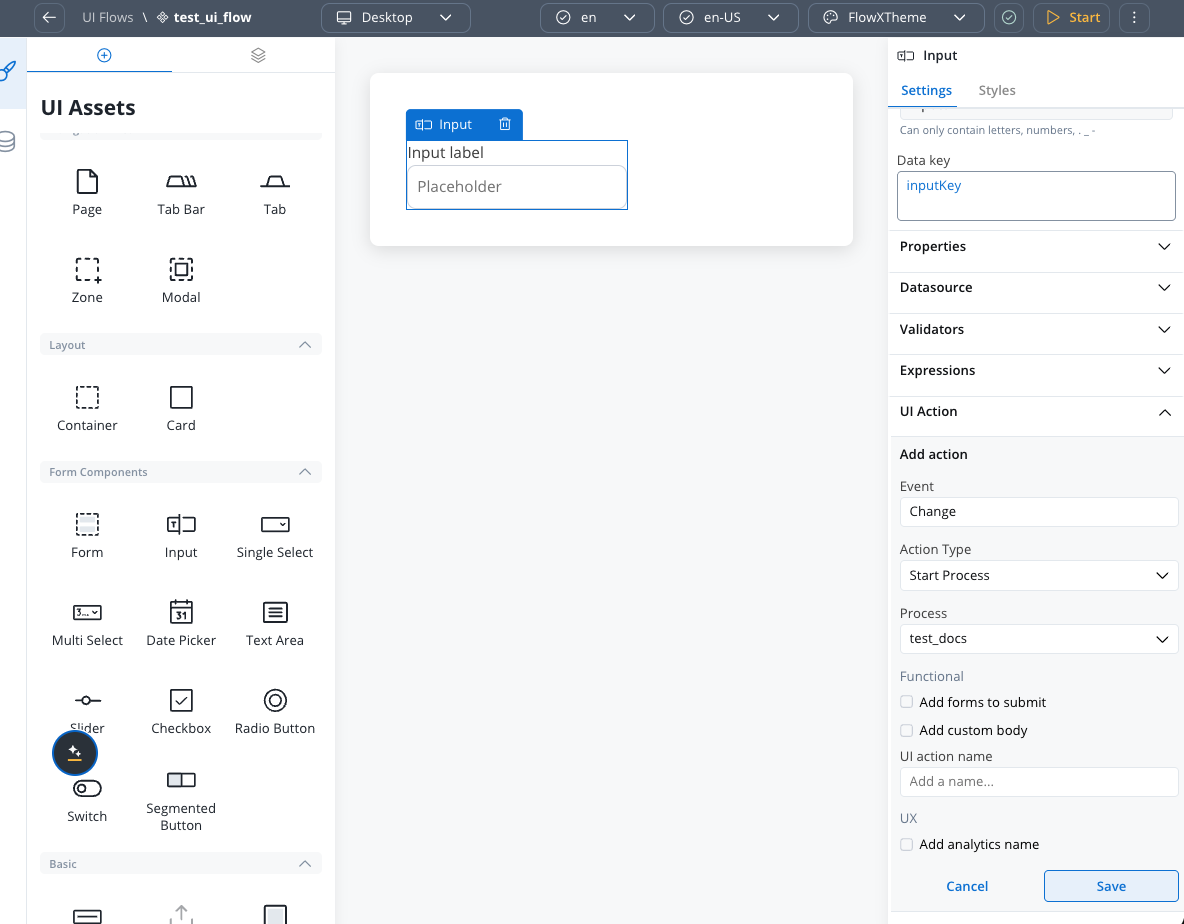
Configure UI actions
Setup interactivity and navigation:
- Start Process: Launch processes when needed
- Navigate To: Move between Nav areas or scroll to containers
- External: Open a link in a new tab
Set home page (optional)
Designate a page as the home page:
- Select the Navigation Area
- Mark as “Home Page”
- Configure home icon appearance
Configuring Start Process UI action
The Start Process UI Action allows you to launch FlowX processes from UI Flows. Although UI Flows do not require a process and user tasks, they support actions for process initiation.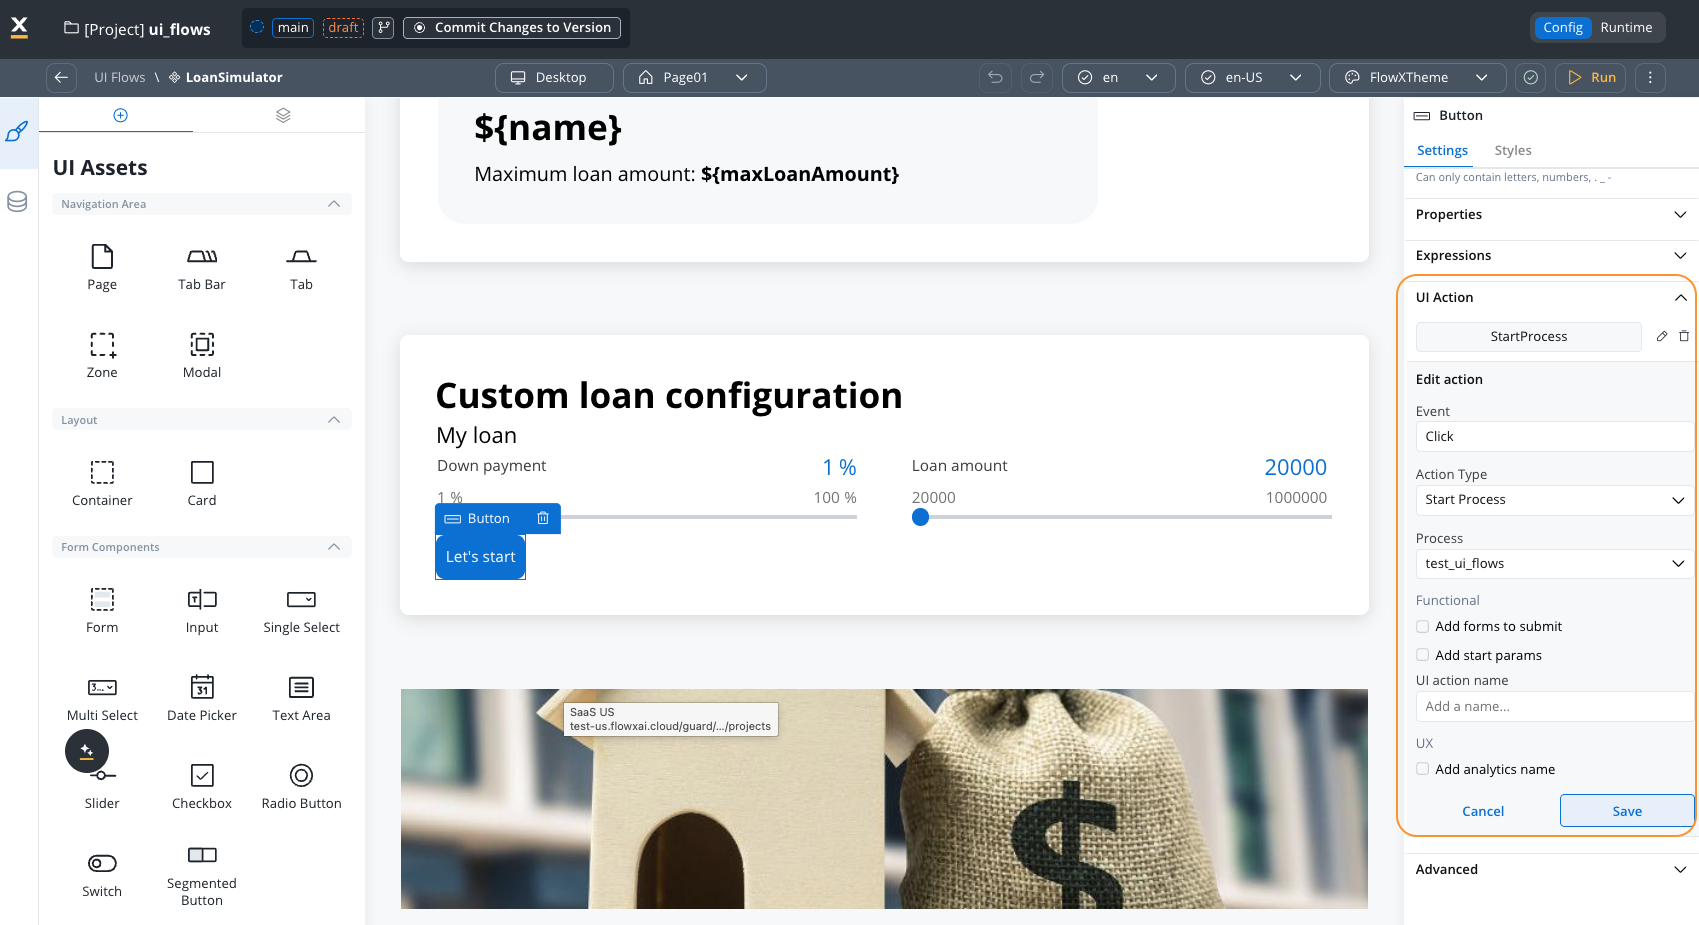
How it works
When a process is started from a UI Flow:- The
FlxProcessRenderercomponent is dynamically added, replacing the UI Flow content - The process renderer inherits configuration from the UI Flow and shares common stores:
- API URL and static assets path
- Workspace and project IDs
- Language and locale settings
- Build information
- Theme and fonts
- Substitution tags and media items
When configuring the
FlxUIFlow component in your container app, ensure the processApiPath parameter is set to enable process starting capabilities.Configuration steps
Add UI Action
Configure the UI Action:
- Click Add UI Action
- Select Start Process type
- Choose the process definition to start from the dropdown
Configure forms and data
The Start Process action allows you to configure:
- Process selection: Select the process to start
- Forms to submit: Choose which forms to include with the start request
- Custom body: Define which data to send as start parameters
Configure behavior
Set what happens after process starts:
- Navigate to process UI
- Stay in UI Flow
- Show confirmation message
Configuring Start Workflow UI action
Available since FlowX.AI v5.5: The Start Workflow action enables UI Flows to trigger integration workflows directly without requiring a full process instance.
When to use Start Workflow vs Start Process
| Use Case | Action Type | Description |
|---|---|---|
| Data fetching | Start Workflow | Retrieve data from APIs or databases |
| Simple operations | Start Workflow | Execute stateless operations (calculations, validations) |
| Integrations | Start Workflow | Call external services and return results |
| Business processes | Start Process | Multi-step processes requiring state management |
| User journeys | Start Process | Processes with multiple user interactions |
How it works
When a workflow is started from a UI Flow:- The workflow is executed via the Runtime Manager API
- Input parameters are mapped from UI Flow data
- The API returns a
workflowInstanceUuidfor tracking - UI Flow subscribes to SSE events for workflow completion
- Results are mapped back to UI Flow data for display
API endpoint
| Parameter | Type | Description |
|---|---|---|
workspaceId | Path | Workspace identifier |
appId | Path | Application identifier |
resourceDefinitionId | Path | Resource definition ID for the workflow |
| Request body | JSON | Workflow input parameters |
SSE events
The UI Flow subscribes to Server-Sent Events (SSE) to receive workflow completion notifications. Event type:UI_FLOW_WORKFLOW_RESPONSE
Configuration steps
Add UI Action
Configure the UI Action:
- Click Add UI Action
- Select Start Workflow type
- Choose the integration workflow to execute from the dropdown
Configure output mapping
Map workflow results back to UI Flow data:
| Workflow Output | UI Flow Data Key | Description |
|---|---|---|
accountBalance | uiData.balance | Store the returned balance |
lastUpdated | uiData.balanceTimestamp | Store timestamp |
Data mappers
Configure input and output data mapping between the UI Flow and the workflow. Input mapping:Example: Fetch account balance
v5.5.0 Enhancement: Start Workflow now supports organization-aware execution with organization ID propagation from the workflow instance for proper multi-tenant isolation.
Loading states
During workflow execution, configure loading behavior:| Option | Description |
|---|---|
| Show loader | Display a loading indicator during execution |
| Disable trigger | Disable the button while executing |
| Loading text | Custom text to show during loading |
Response handling
Handle workflow responses to update the UI:Success handling
Success handling
- Map response data to UI Flow data store
- Trigger UI updates based on new data
- Show success notifications (optional)
- Execute follow-up actions
Error handling
Error handling
- Display error messages to users
- Log errors for debugging
- Provide retry options
- Execute fallback actions
Configuring Navigate To UI Action
The Navigate To UI Action handles navigation within UI Flows and scrolling to specific elements.Navigation behavior: Route vs Scroll
The Navigate To action either routes (changes the URL/view) or scrolls (anchor navigation) depending on the context:| Scenario | Behavior | Example |
|---|---|---|
| Destination inside same Navigation Area (single page) | Scroll | Button in Card X scrolls to Card Y within the same Page |
| Destination inside same Navigation Area (wizard navigation) | Route | Button navigates to next step in a wizard Page |
| Destination outside Navigation Area, different root | Route | Button in Page 1 navigates to Page 2 |
| Destination outside Navigation Area, same root (wizard) | Route | Button in Zone 1 routes to Zone 2 within a wizard Page |
| Destination outside Navigation Area, same root (single page) | Scroll | Button in Zone 1 scrolls to Zone 2 within a single-page layout |
| Destination is a Modal | Route | Button opens Modal as a routed view |
Detailed navigation examples
Detailed navigation examples
Navigate to Navigation Area
Configure Navigate To action
- Add UI Action → Navigate To
- Select target: Navigation Area
- Choose the destination Navigation Area
Scroll to Container
Embedding Task Manager
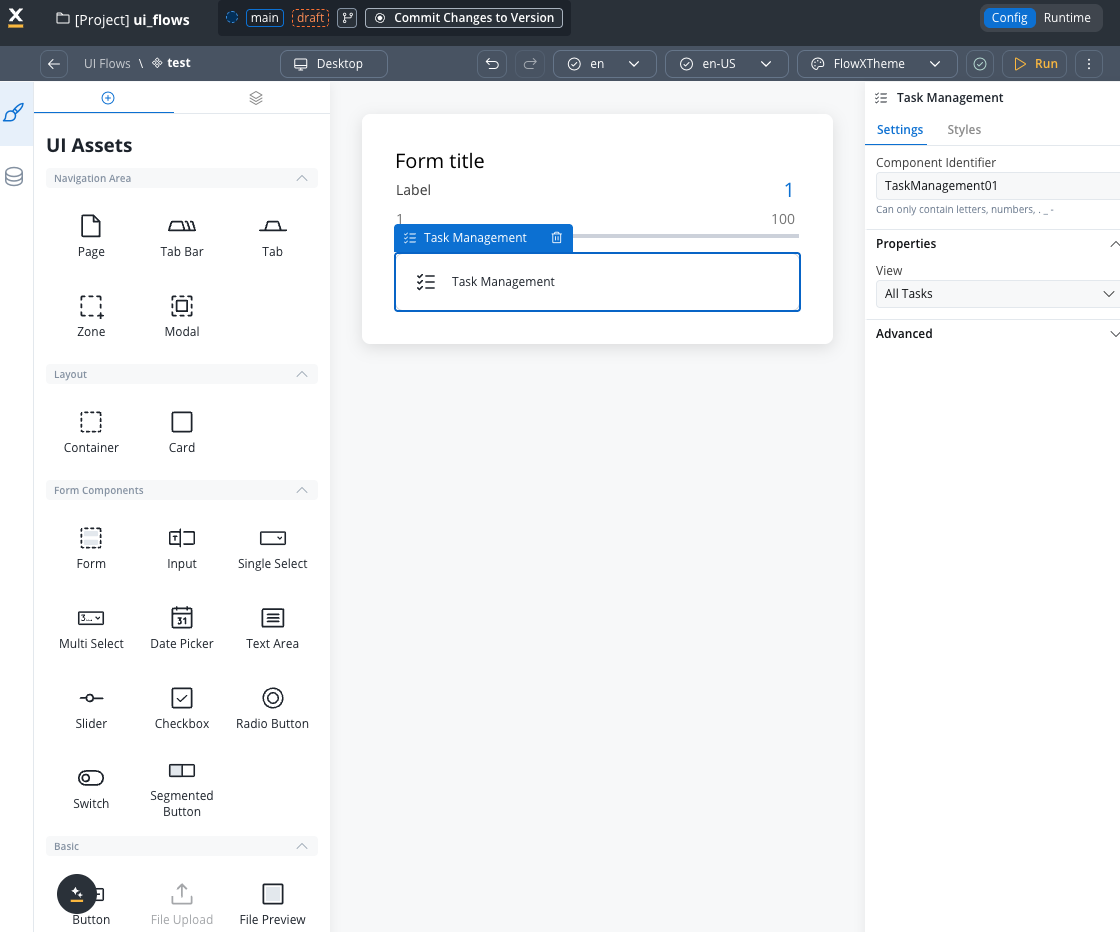
Add Task Manager as a UI component in UI Flows to display task lists without requiring a process.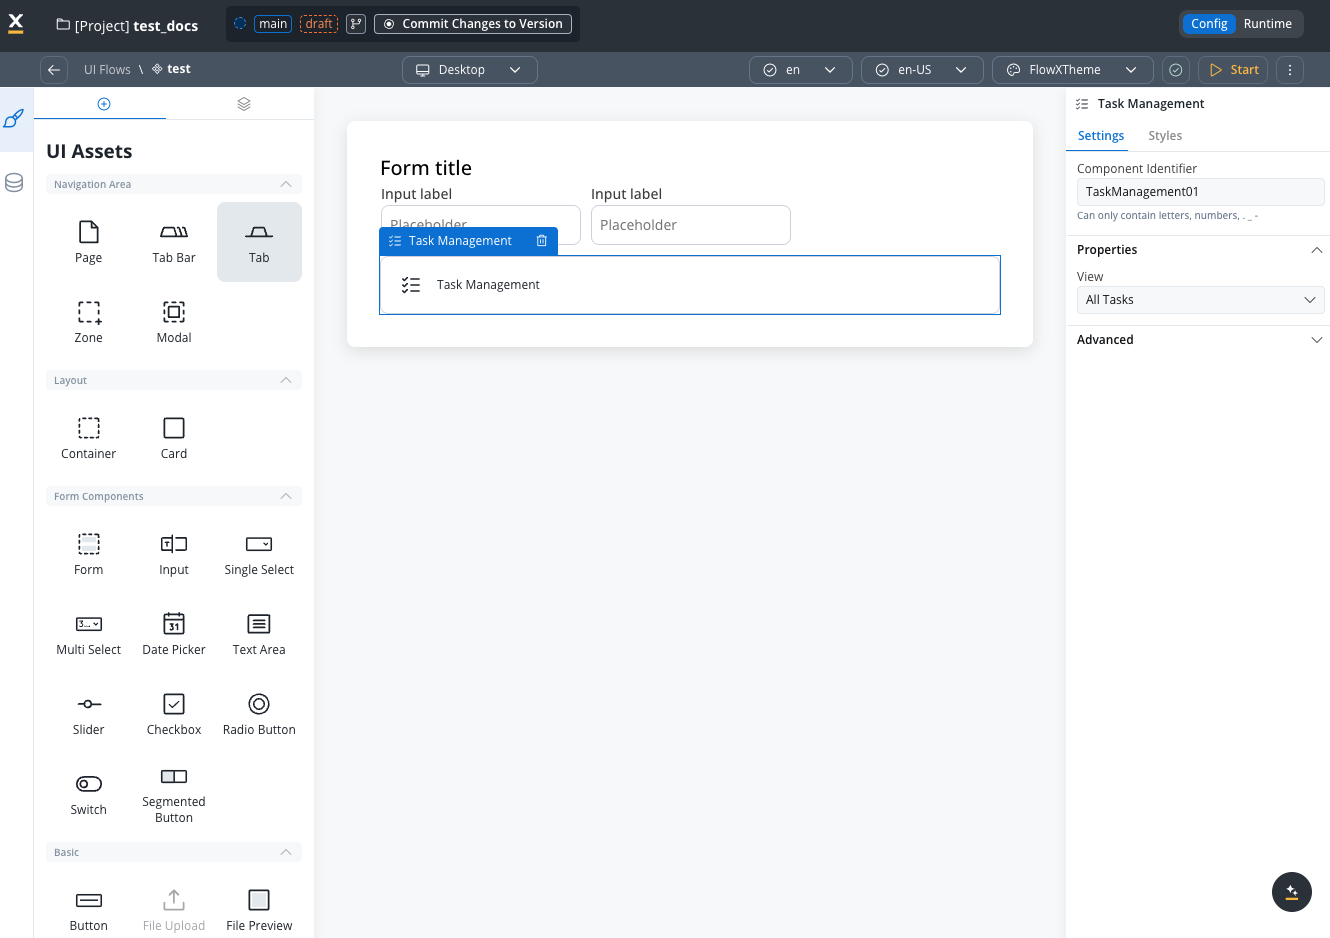
Add Task Manager component
In UI Flows Designer, add the Task Manager component to a Container or Card.
Embedding Chat component
Available starting with FlowX.AI 5.4.0: Add the Chat component to enable conversational AI experiences within your UI Flows.
AI Agent Conversations
Connect to conversational workflows powered by AI agents
Session Persistence
Automatic session handling across page refreshes
Add Chat component
In UI Flows Designer, select Chat from the UI Assets panel and drag it onto the canvas.
Configure the agent workflow
In the Settings tab, specify the Agent ID / Workflow Name for the conversational workflow.
Chat Component Documentation
View the complete Chat component documentation for detailed configuration, memory capabilities, SDK integration, and best practices.
Routing
UI Flows use a simplified routing approach for navigation:| Route Type | Description |
|---|---|
| UI Flow Route | The base route is defined by the UI Flow where the FLX UI Flow component is added |
| Process Instance Route | When a process is started from a UI Flow, an additional route segment is added based on the process instance UID |
Browser back button support
When a process starts from a UI Flow, a new route is created based on the process instance UID. Users can return to the UI Flow using the browser’s back button.Future enhancements: Additional routing logic is planned for future iterations, including routes defined based on multiple root navigation areas and new action types for navigation.
Platform considerations
- Web
- Mobile
Full Feature Support:
- All UI component types available (except File upload)
- Navigation Areas with zones (header, content, footer)
- Full wizard and single-page navigation
- Task Manager component integration
- Stepper & Step
- File upload
- Page
- Tabbar
- Zone
Best practices
Architecture
Use UI Flows for UI Logic
Keep navigation, layout, and presentation in UI Flows
Use Processes for Business Logic
Delegate complex business operations to processes via Start Process action
Minimize Data in UI Flows
UI Flows are stateless - pass necessary data to processes when starting them
Reuse Across Projects
Design UI Flows for reuse across multiple apps
Design
DO: ✅ Create clear navigation hierarchies✅ Use descriptive names for Navigation Areas
✅ Test on all target platforms before deployment
✅ Configure accessibility properties for mobile
✅ Use Task Manager component for task-centric applications DON’T: ❌ Duplicate business logic in UI Flows and Processes
❌ Create overly complex navigation structures
❌ Ignore platform-specific limitations
❌ Skip accessibility configuration for mobile apps
❌ Use UI Flows when you need process state management
Migration from subprocess-based navigation
If you currently use subprocesses for UI-only scenarios, consider migrating to UI Flows:Identify UI-only subprocesses
Review your subprocesses and identify those that:
- Only display UI without business logic
- Act as navigation shells
- Could be replaced with simpler UI
Create equivalent UI Flow
Build a UI Flow that replicates the UI functionality:
- Create Navigation Areas matching subprocess pages
- Add UI components
- Setup navigation using Navigate To actions
Migrate process launches
Replace subprocess starts with Start Process UI Actions:
- Keep actual business processes as processes
- Launch them from UI Flows when needed
Test thoroughly
Verify functionality across platforms:
- Navigation works correctly
- Process launches function properly
- Data flows as expected
Limitations and compatibility
Current limitations
- Data Persistence: UI Flows don’t persist data like processes do - data must be passed to processes for storage
- Data Fetching: UI Flows cannot directly fetch data from external systems - use Start Process action to retrieve data via process integrations
- Back Navigation: Limited back navigation compared to process-based flows
- Complex Conditionals: For complex business rules, use processes instead
- Reusable UI: Reusable UI components are not yet supported in UI Flows
- Permission-based UI: UI visibility based on user permissions is not yet available
- Undo-Redo: Limited undo-redo support in UI Flows Designer
- Multi-Instance (Concurrent): While a UI Flow can launch multiple process instances (for example, separate buttons for mortgage or credit card applications), it cannot yet have multiple instances running concurrently from the same page
Future enhancements
Planned for future releases:- Data fetching: Retrieve data from FlowX or external systems via workflow API integration
- Reusable UI integration: Integrate reusable UI components in UI Flows with input/output parameters and data mappers
- Permission-based UI: Configure UI visibility and behavior based on user permissions
- Enhanced resource management: Undo-redo, caching, resource usages, merge conflicts, and audit logging
- Advanced actions: Start project with entrypoint, start process/project with mappings
- Additional UI components: Modal as UI element, Process component
- AI integration: Additional AI-powered features for UI Flows
Troubleshooting
Start Process UI Action not working
Start Process UI Action not working
Possible causes:
- Process definition not published
- Missing required process parameters
- Insufficient permissions
- Ensure process definition is published in target environment
- Verify all required parameters are mapped in UI Action
- Check user has permission to start the process
- Review browser console for error messages
Navigate To action not working
Navigate To action not working
Task Manager component not showing tasks
Task Manager component not showing tasks
Possible causes:
- Task Manager not properly configured
- User doesn’t have tasks
- Filter configuration too restrictive
- Verify Task Manager component configuration
- Check user has assigned tasks in Task Manager
- Review and adjust filter settings
- Ensure Task Manager service is running
Platform-specific configuration not applying
Platform-specific configuration not applying
Possible causes:
- Wrong platform selected in preview
- Configuration not saved
- Cache issues
- Switch platform tabs and verify configuration
- Save UI Flow and refresh browser
- Clear browser cache and reload
- Test on actual device if possible
Related resources
UI Designer Overview
Learn about UI Designer capabilities and interface
Navigation Areas
Understand Navigation Areas in processes and UI Flows
UI Actions
Configure UI Actions including Start Process and Navigate To
Task Management
Learn about Task Manager and task management capabilities
Chat Component
Add conversational AI experiences to your UI Flows
AI Platform
Explore AI capabilities in FlowX