- Design a BPMN process with multiple node types
- Create user-facing forms
- Integrate with external systems
- Handle branching logic based on business rules
- Send notifications
Time required: 30-45 minutesPrerequisites:
- Access to FlowX Designer
- A workspace and project set up (create one here)
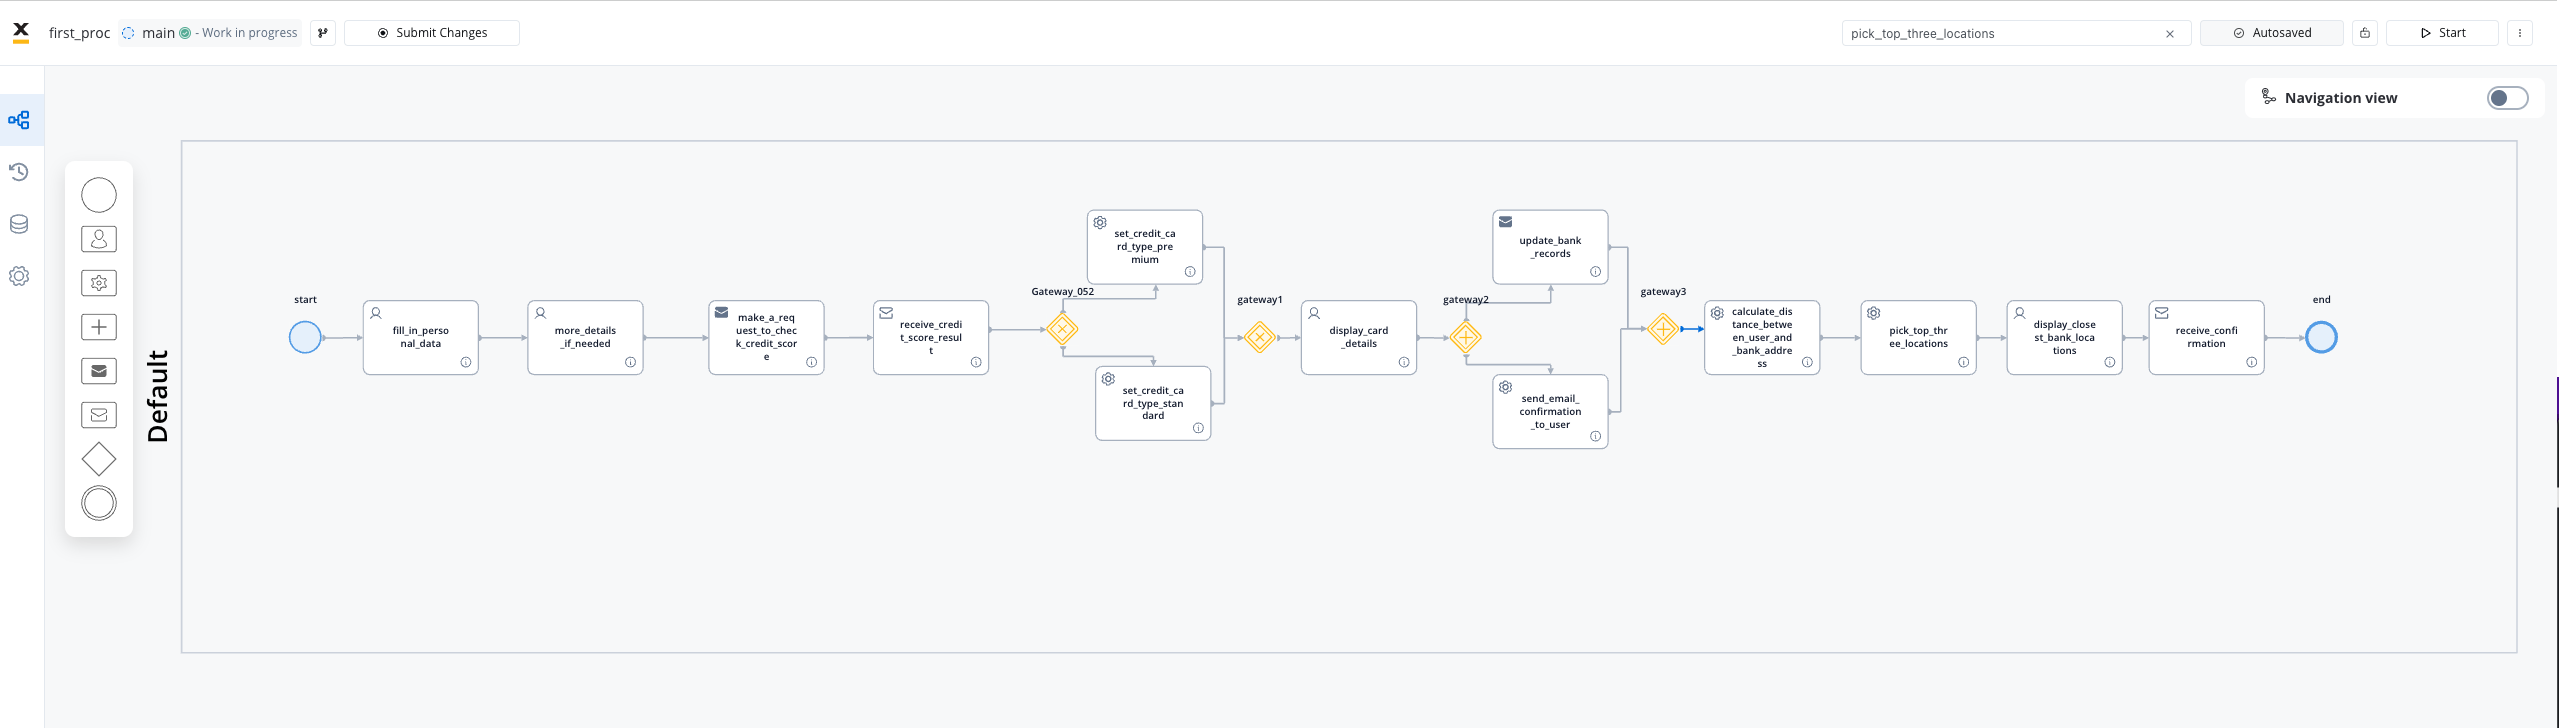
What you’ll build
A customer requests a new credit card through a bank app. The process:- Collects personal information
- Checks credit score automatically
- Assigns a card type based on the score
- Sends confirmation email
- Lets the user pick a branch for card pickup
Download this process
Import this BPMN file to follow along or explore the finished result.
Step 1: Create the process
Learn more about processes
Step 2: Collect user data (User Task)
The first step is collecting the customer’s personal information.Design the form
In the node settings, open the UI Designer. Add form fields:
- Full name (text input)
- Email (text input with email validation)
- Date of birth (date picker)
- Annual income (number input)
Learn more about User Tasks
Step 3: Check credit score (Service Task)
Now we’ll call an external credit scoring service automatically.Add a Send Message Task
This sends the customer data to your credit score adapter.Configure the Kafka topic to send to your credit scoring integration.
Learn more about integrations
Step 4: Branch based on credit score (Exclusive Gateway)
Different credit scores qualify for different card types.Configure branch conditions
- Branch 1:
application.creditScore >= 700→ Premium card - Branch 2:
application.creditScore >= 500→ Standard card - Branch 3: Default → Basic card
Learn more about Gateways
Step 5: Show results and confirm (User Task)
Let the customer review their card type and confirm.Step 6: Send notification and register (Parallel Gateway)
After confirmation, two things happen simultaneously:Branch 1: Send confirmation email
Add a Send Message Task that triggers the notification plugin.Configure email template with customer name and card type.
Branch 2: Register in bank system
Add a Send Message Task to your bank system adapter.This creates the card request in your core banking system.
Learn more about Notifications
Step 7: Select pickup location (User Task)
Let the customer choose where to pick up their card.Add a Service Task to fetch locations
Call an API (like Google Maps) to get nearby branches based on customer address.
Step 8: End the process
Add a Receive Message Task
This waits for confirmation that the customer picked up the card (from branch system).
Test your process
Start a process instance
Click Run to start a new instance. Fill in the forms and watch the process flow.
What you learned
You’ve built a complete process that demonstrates:| Concept | How you used it |
|---|---|
| User Tasks | Collecting data, showing confirmations |
| Service Tasks | Calling external APIs, setting data |
| Exclusive Gateway | Branching based on credit score |
| Parallel Gateway | Running email + registration simultaneously |
| Integrations | Credit score check, bank system, notifications |